I start out with pencil and paper. Here is about how big I want my middle square.
Then I mark my block out (you would think, us being a home schooling family, that I could find an eraser in this house!! LOL)
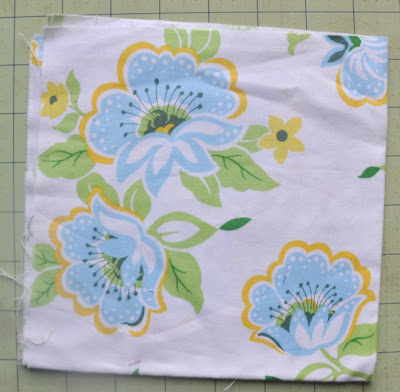
I wanted to use the last of my Nicey Jane, showing off the print. But I didn't measure how much of it I had left, so ended up making mine just a little smaller than what the block up above shows.Pieces all cut and ready to sew.
If you're quilting as you go, you want to make the smaller pieces into bigger ones. Ones that make up rows or columns, or in this case, triangles.
Figure out the rest of the place mat.
Then cut your backing and batting. I like to cut mine about an inch or so larger than what the finished front piece will be. A note here about batting. This is a great time to use those small pieces, just whip stitch them together (or use zigzag on your machine) and cut to the right dimensions.
Layer your batting and backing out (backing, right side DOWN) and smooth it. Then you want to mark the center.
And place your middle piece evenly. Pinning it down. I also like to pin the batting to the backing in a few places (taking them out when I lay pieces down if need be).
I marked the center of all the sides on the square. Then laid my first piece down, pinning the middle of it to the middle of the square. (I am not much of a pinner, but when you quilt as you go especially, pinning helps keep things in place. As you can't do a lot of fudging to make sure things line up right.)
Go around your square, pinning and sewing with a 1/4" seam.
Make sure the pieces you have sewn first, get opened up so that the next pieces are laid on properly.
And now you can iron these flat too. It's important to get your sizes just right, as it's much harder to trim this way.
You can use a small pair of scissor's to cut the dog ears.
Add your sides, pinning really helps with the longer pieces. You can use your scissors to cut off the yellow ends there. But I do it after the top and bottom piece are put on, so that it's more accurate.
Add top and bottom.
Add the next two pieces. Now do you see why I say to make your backing and batting a bit bigger than you need? It's easy to trim this up.
And then add your binding. Can you believe, I forgot to take a picture of it all trimmed and pretty??! LOL. I'll do that when the sun comes up and post it.
Hope you've enjoy my little Summer mat. This is a nice way to use up the last of your little pretty.
Have a great day, thanks for stopping by.
Dorian
©Copyright D. Lucas, 2011 This is my tutorial. You are welcome to use any of my tutorials for personal use. You are not permitted to use my pictures or my words without linking back to the original and giving me credit for them.


1 comment:
Very nice and summery, Dorian! LOL at forgetting to take a final pic! You need your coffee today. ;-)
Post a Comment