When I first learned to quilt, about 17 yrs ago now, I read all the books I could get my hands on. And some of them were books by Georgia Bonesteel. Who taught me how to quilt-as-you-go....something that I have done very little of. LOL
But anyways, here is the gist of it. It's easy and a GREAT project for practicing machine quilting (which I need a lot of!)
First thing to do is make your blocks. All of them. I made 4, just to show you the technique. Cut out squares from your backing material that is just a bit larger than your blocks, maybe an inch (which I failed to do, so things were tight later on). Cut your batting pieces about 1/2" smaller than your blocks. So you will have squares of backing and batting, enough for as many blocks as you make.
Layer them in the normal way, and pin.
Then quilt each of your blocks individually. And trim your backing to the size of the front.
Now take two blocks, put them right sides together. Pin the backing fabric away from the edge where you are going to sew.
Now pin the edge of the top pieces together, and sew a 1/4" seam.
Here is the front and back.
Keep adding blocks to make the rows as long as you need them.
Then take one row, and lay if face up and another row and lay it face down on top. Pin your backing out of the way, match your seams up, and pin and sew top of the rows together (just like you did for the blocks).
Here is the top of my 4-square.
And here is the back.
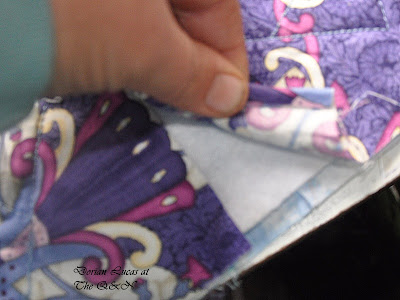
Now smooth out one backing so that the edge goes under the edge of the next block.
Now fold over the other edge, 1/4" inch.
And lay it down on top of the first edge. Do this along the whole length of one seam. Start with either the vertical seams or horizontal ones, but do all of them before the next.
Pin and sew. You can either whip stitch this by hand or you can sew it by machine. Going right thru the top layer if you use your machine.
When you've done all the horizontal (or vertical) rows, move to the vertical (or horizontal) rows. Lay down one edge flat, fold the other 1/4" under.
Pin and sew.
And here it is, all done...Except for my machine kept acting up and I am going to have to resew both my horizontal and vertical rows. I can't whip stitch them, as it hurts my hands. So I need to fix the tension or something...sigh~ and I just noticed that my seams weren't matching on the two bottom blocks too...
So it's to the seam ripper I go...and then I can bind it....if I made the machine behave.
Have fun!
Thanks for stopping by
Dorian
Copyright D. Lucas, 2011 This is my tutorial. You are welcome to use any of my tutorials for personal use. You are not permitted to use my pictures or my words without linking back to the original and giving me credit for them.


1 comment:
Nice tutorial, Dorian. Sorry about your machine. I hope you "whipped" it into shape! lol
Post a Comment