I just love Prairie points (or PP from now on) on a quilt. They just put the right finishing touch on it. Especially baby quilts! Or mug rugs! Or even purses. I saw a darling wall hanging of a sailboat, that used PPs as the waves! it was soooo cute!! (Sorry blogger who did it, I have forgotten where I've seen it.)
This one, at the top there, was a Aunty quilt we did on the forum for one of our members' grandchild.
Sandy has asked for a tutorial, and I am more than happy to oblige :) So here we go.
Cut your squares for the PP's the size you want the base of the triangle...the base is the side that is going to be sewn onto the quilt. So if you want a 3 1/2" triangle, then cut 3 1/2" squares. How many triangles you need, depends on how big your triangles are. I divide the finished PP measurement (in this case I use 3") into the length of a side. So for a 30" unfinished top, I would make 10 triangles for that side. Sometimes I use more or less than that number though.
So, here's your square.

Fold it in half diagonally.

And then fold it in half again (ironing makes it look pretty and easier to handle).

Now you have one side (the base) which is raw edges, and two sides that are folded.
Open up the corner where the last fold was made, just a little bit to slip in the next triangle. I like to put it in about a half an inch. Then sew, using a scant 1/4" seam (some people use 1/8"). Stopping about halfway thru the triangle, to put the next one in. (Line the edges up of course, I just stuck the yellow one out to show you.)

Continue on in this manner until all your triangles for ONE side is sewn in a row.
When all your triangles are sewn in a row, it's time to put them on the quilt.
I am not much into pinning and ironing, lol, but this is a time for both.
Iron the backing and top edges down 1/4".

Slip the row of triangles in between. Making sure your line of sewing is not going to show.
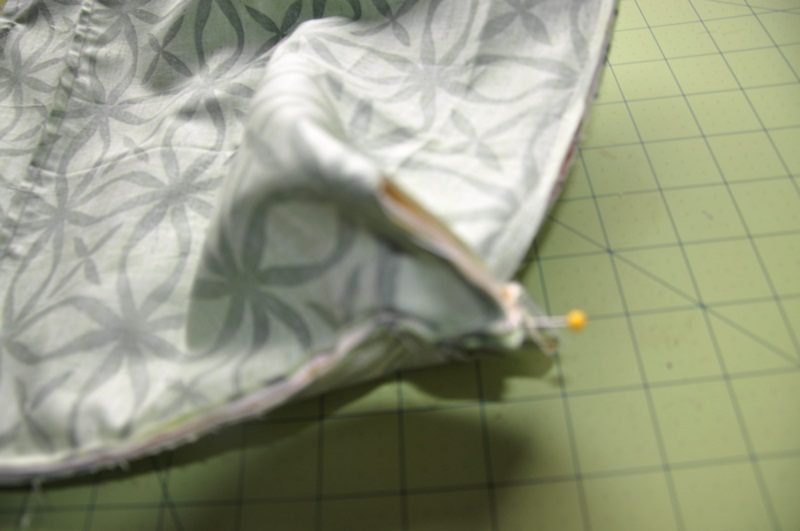
At the corner, put the very tip of your triangle right inside the edge of the opposing side.

Lay the top ironed edge over the triangle and pin the row in place.

Here's what it looks like looking down on it from the edge.

You notice that where the two triangles meet, is right at the very edge. You don't want it sticking up further, and you don't want it too far into the sandwhich either.
Sew the sandwhiched triangles, using 1/4" seam. Starting and stopping about 1/2" away from the corner. Taking a few back stitches.
Do the same thing for the next side. Lining up the end triangle with the one that is already sewn on (you want a nice, straight line across that corner point).

When you sew this one down, you can start at your stopping place on the first side, then just pivot at the corner.
Continue till all sides are done.

******
There is another way to fold your triangles, using rectangles. You fold the two top corners down to meet in the middle, at the bottom edge, then fold in half. But squares are easier for me.
Alternatively you can sew all your triangles together in one loooooong line, and then when you pin it on, make sure that you line the triangles up right, so that where two triangles meet, is right at the corner. So it looks this.
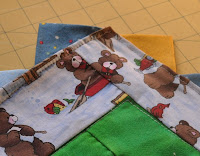
(My two corner triangles actually make a straight line across the corner....this angle must be wrong or something....no, really they do! LOL)
*****
I hope that helps Sandy! And anyone else who wants to do this darling finish. If you have any questions, please feel free to leave a comment, and I'll get back to you.
Till next time...
Dorian
Copyright D. Lucas, 2011 This is my tutorial. You are welcome to use any of my tutorials for personal use. You are not permitted to use my pictures or my words without linking back to the original and giving me credit for them.